

DIY // Blackboard Do-Up…
Last updated on 21 April 2016
This post may contain affiliate links. If you make a purchase with one of these links, I recieve a small commission at no additional cost to you. Read the full Affiliate Policy.
One day, as I was sitting in the lounge in our house in England, Mum came walking in carrying something large and dusty, cover in dirt and marks.
“Look what I found on the side of the road!” she said, turning it around so I could see. “I though you might like it.”
It was an old blackboard. And it was awesome. Now, I would just like to point out that my Mum isn’t a fan of me collecting wonderful things (aka ‘junk’) so I can use them later on, do them up, or create them into something else. So her actually stopping and picking up this blackboard from the side of the road was, in itself, an incredible occurrence. I used it a few weeks later for the work Carnival that Anne and I organised, and while it wasn’t really a main feature, it still looked great. I knew it was definitely something that needed to come back home to New Zealand with us.
We haven’t been in our new house for very long, and it seems to be taking forever to get everything sorted, hung on walls, and generally tidy and back to semi-normality. But I was moving things around my room last week, and after finally buying a desk (for $5!), I had somewhere to hang my old blackboard. But it was a bit scuzzy, so I decided it would need a paint. And here’s what happened:
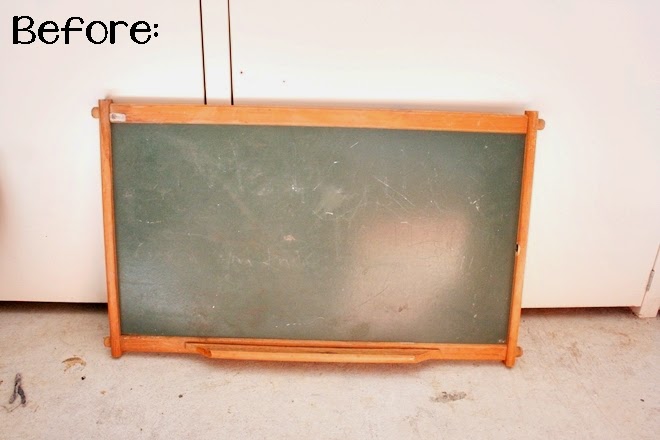
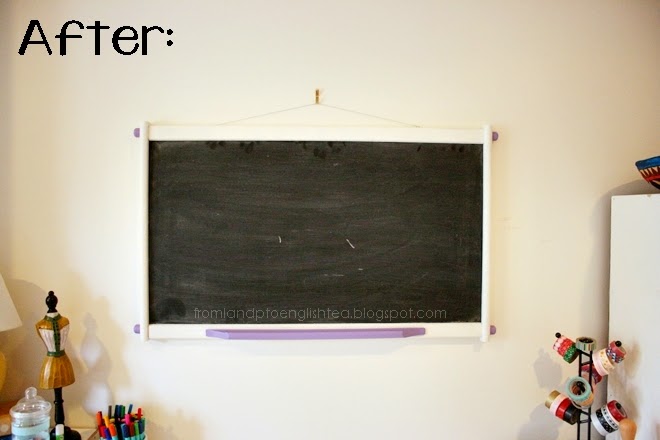
Bit of a change, eh? My mum complained that I was ‘ruining an antique’, but I just told her I had turned it into a cute vintage blackboard, rather than an old, yucky antique green board that didn’t really hold the chalk on. I took the whole thing apart (it’s just held together with screws), sanded it all back, including the black board part, painted the frame white with some paint left in the garage from the previous owners (thanks, guys!), and then repainted the black board part with two coats of black board paint. The accents of purple are on the knobbly bits where the screws are, and the ledge where chalk goes. I then coloured the entire black board in chalk, and dusted it off, and put it all back together again, much like Humpty Dumpty.

On the back there were two small rings where it had obviously been hanging from before, so I took some picture hanging wire, tied it to the two rings, and hammered a picture hook into the wooded stud in the wall. My Dad assures me it will stay up like that, and while I’m sure he knows what he’s doing, I’m going to be moving my laptop away from under it each time I leave the room…just in case.
So there we have it! My new old blackboard. I’m quite please with how it came out, and looking at it now, I think it works well where it is. Speaking of which, look out for a room tour soon!

Anjali Kay
Anjali Kay is an Aotearoa New Zealand-based blogger and book lover sharing travel inspiration, bookish posts, the occasional creative project, and a lot of practical blogging tips here at This Splendid Shambles. Based in Auckland, she's been writing book reviews and travel posts, sharing creative projects and blogging tips since she started her first blog in 2009. When she's not working on her own blog, Anjali also offers blog coaching and support for bloggers who want real guidance from someone who's actually done the work, and is a few chapters ahead of them.


Having fun? Check out these posts!

DIY Word Art…

DIY | Decorative Tape Notebook
