DIY Dursley’s Fireplace with Flying Acceptance Letters
Last updated on 18 December 2024
This post may contain affiliate links. If you make a purchase with one of these links, I recieve a small commission at no additional cost to you. Read the full Affiliate Policy.

How to create a Dursley’s fireplace with Hogwarts acceptance letters flying out of it
A few months ago we held the annual Hogwarts Dinner party for the youth at our church. We transformed the entire 1894 building into Harry Potter‘s school, and the kids who attended got to go to classes, talk with the professors and even visit Honeydukes.
As it’s an annual occurrence, many of the props and set ups were already stored in the basement, with the usual rented items coming from First Scene here in Auckland. But there were a few new things that were being set up that needed to be made. I’m not a youth leader, but I volunteered to help because, well, Harry Potter. One of my jobs was to create the Dursley’s fireplace for the Muggle Studies classroom, complete with mantle decorations and, of course, Hogwarts acceptance letters cascading down and out the chimney.
The following DIY tutorial is more an explanation of how I created our one. You’re unlikely to have the exact same items to use as we did, but hopefully it’ll give you the main ideas and you can with what you’ve already got.
Let’s get into it.
Materials needed for the Dursley’s fireplace
- Corrugated cardboard
- Paint (brown, black, white, red, yellow)
- Pencil
- Ruler
- Scissors or craft knife
- Paintbrushes, rollers or sponges
How to create the Dursley’s fireplace
To make sure your fireplace actually stands strong, I suggest using a table as the frame, two chairs, or just create a flat-lay effect on the wall. I’ll be explaining the table option here but you make it work with whatever you decide.
Wonderfully, we had a perfect sized table available to us, which had beautiful wooden features that I decided to use rather than hide behind the cardboard. If you don’t have a table like this one (have to say it’s not that common a house-hold item), then you can wrap any table you like with the cardboard.
The fireplace
1. Measure your table’s height and right along the front and sides. This is how big you want to cut your corrugated cardboard. Once you have the size, find one of the photos online of the Dursley’s fireplace (or something close to it – I used this photo) and draw out how you’re going to paint it. Because I was using the wooden features already in place, I painted the edges a creamy colour, then a ‘trim’ on the inside a medium grey to imitate silver.

2. Next you want to create a brick-like texture pattern on the inside area. I used a sponge and gently dabbed the paint and then placed it lightly on the cardboard. Once it’s all dry, cut straight up the bricked middle section to the top of the curved part of the fireplace. Then you’re going to want to cut along the top curve, but not down the straight sides of the fireplace. This is because you’re going to fold them inwards, to create a 3D fireplace.
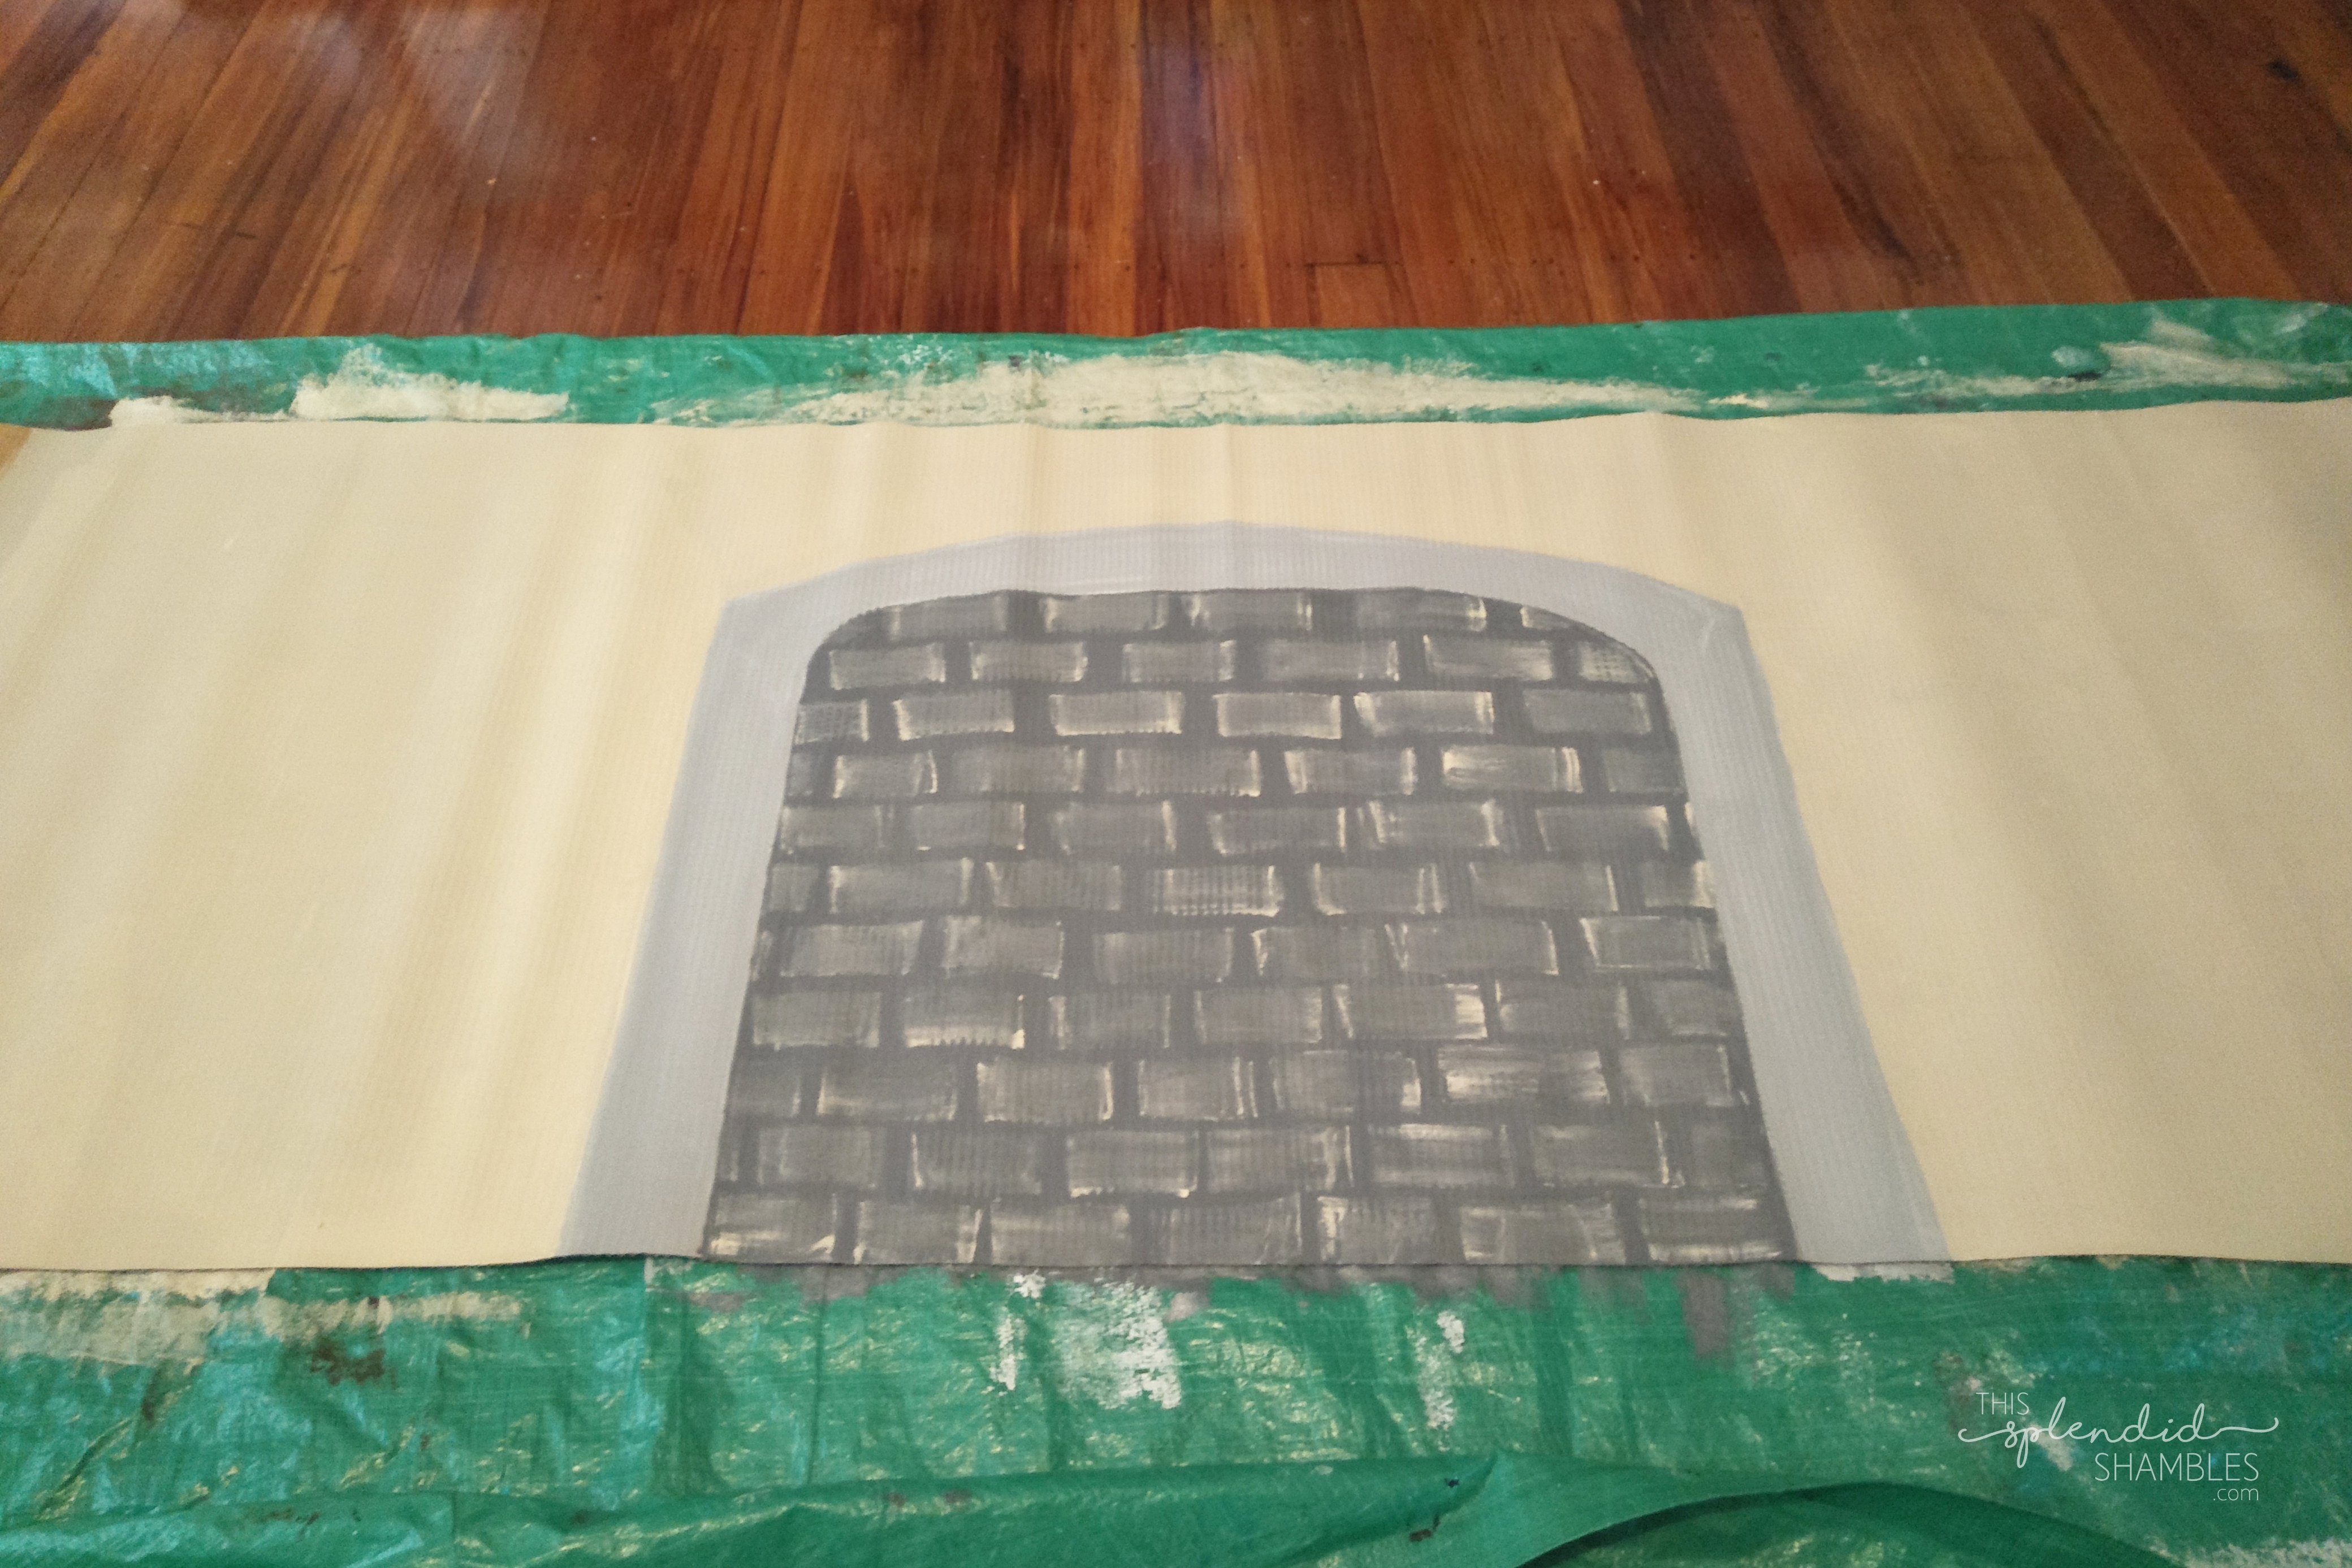

3. If you have spare cardboard left out, paint some more brick pieces like the ones you just did on a piece about 40cm wide (although use your judgement to determine the width in related to how big your brick opening is at the back); this is going to sit inside the fireplace, at the back, to create that back wall. If you don’t have any cardboard left, black paper or even a printed poster with flames on it would do the trick.
4. Wrap your (dry!) painted cardboard around your table (or insert it into the gap if you have a table like mine), and secure with tape or tack. Gently push the brick middle inwards to create that alcove, placing your extra brick cardboard, black, or flame piece behind. You may need to secure this to the wall or to the inward facing flaps of the brick.
The final touches
You can use real wood or fake wood for the logs, but I found the heavier they were the better. Stack them inside the fire place and make sure they’re stable.
Using fishing wire (or clear wire/string of some kind) secure one end to the wood in the fireplace, and the other end at a higher point somewhere. For this fireplace, there were hooks up high, and wall lamps that I secured the other end to, but you could use lights, curtain rails, basically anything higher than the fireplace. Make sure they’re tied quite taught. For this one I did 4 different wires coming out, though you can do as many as you see fit.
To make the Hogwarts Acceptance Letters envelopes, print out this document here, cut around the outside of the entire thing and fold in half so you have a back half and a front half. Instead of gluing them together straight away, place glue on one side, then put them straight onto the fishing wire you just tied. Push the sides of the envelope together, with the wire between. Glue as many as you like, and at different angles, some upside down, some backwards etc, so it looks random. Pop a few right near the fire too, and if you can, falling from the ‘chimney’ inside.
If you have any of those pretend LED candles, a few of those go down well in amongst the wood. Another option is to cut out red and orange felt pieces into flames an place them between the logs, or simply print some.
The mantlepiece
For the top of the fireplace, treat it like a mantlepiece. Print out some photos of the Dursley (none of Harry, of course), and throw in an Aunt Marge for good (or bad) luck. Pop them in frames, with a few other mantle-like pieces and voila. You have yourself the Dursley’s fireplace.

Alternatives
If you’re creating a flat-lay against the wall, don’t cut the brick area in step 2, but rather try painting flames on top of the brick, or cutting out some printed flames and glueing on top.
For the mantelpiece, you can create a long strip of cardboard in a dark brown (woody colour), and attach that right along the top. Print out photographs of the Dursey’s already in frames, and simply blutack them to the wall to create a make-shift mantle.
For the envelopes, you could either just hang them around the room, or if you do it taught enough, you might be able to use strong tape to attach one end to your cardboard fireplace. I suggest having a play around before sticking anything to the beautifully painted fireplace you’ve just created.
And there we have it! I hope this has been helpful, even if it was very specific to our Hogwarts Dinner event. If you have made one in the past or you plan to create one for a future event, I would love to see the final results! Attach a picture in the comments, tag me on Instagram, or Tweet me!
Have you ever made the Dursley’s fireplace before? Or thrown a Harry Potter party?

Having fun? Check out these posts!

12 Harry Potter DIY Crafts to Try This Week

D.I.Y Canvas Shoes
