

How to make a DIY Loom for Weaving
Last updated on 18 December 2024
This post may contain affiliate links. If you make a purchase with one of these links, I recieve a small commission at no additional cost to you. Read the full Affiliate Policy.

When I was young, I remember having a loom. It was this cute wooden thing, only about the size of an A4 piece of paper, and it packed away into a box. I have no idea where it is now, or if it’s still around, tucked into a box somewhere from numerous moves around the world. But I always really enjoyed playing with the loom, so I thought why not do a DIY loom and figure out how to make a loom for myself?
I had seen a bunch of cool woven bits and bobs on Pinterest and the team at A Beautiful Mess was even doing a weaving series when I was doing this project, so I thought it was a timely thing to be doing. It’s super easy to make a loom for weaving at home, and you can probably do it without getting anything new.
Here’s what I did to create my own DIY loom, and you can follow along or tweak it to suit!
How to make a loom for weaving
What you’ll need for a DIY loom
- An old wooden frame (at the size of your choosing)
- Nails
- Hammer
- Ruler/tape measure
- Pencil
- Sturdy string (or similar)
- Wool for weaving
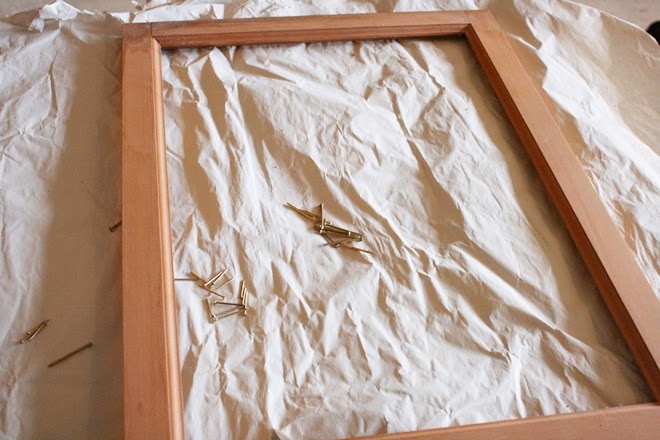
Step 1: Clean your frame
This may seem like a silly first step, but it’s good to give your frame a clean, even if it’s just with a dry cloth. I picked mine up from a thrift store, so it had some grubby bits on it and a bit of a spider web. Just make sure it’s nice and clean.
Step 2: Measure nail points
With your ruler and pencil, measure where you’re going to put the nails on each end. I did a nail at every 1cm, but you can adjust this size to suit. The smaller the gap, the tighter your weave will be.
I actually couldn’t find the number of nails I needed for a 1cm gap between them so I ended up doing every second mark, meaning my gaps were 2cm apart.
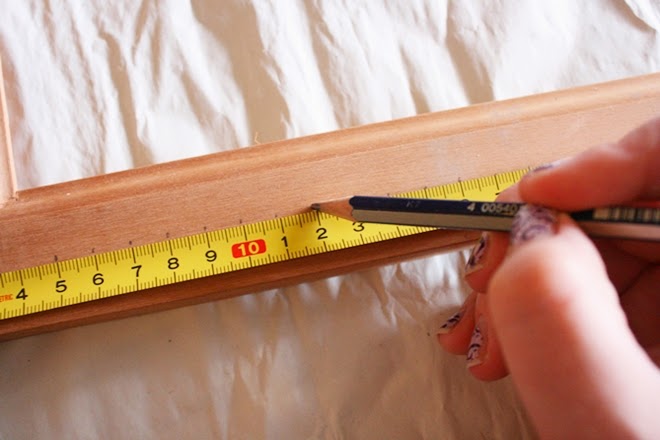
Step 3: Hammer in your nails
Next, hammer in your nails, through the marks that you just made. Remember, you need to actually use these nails to wrap some string around to make your DIY loom, so don’t hammer them all the way through. I hammered the nails in until there was about 1.5cm of the nail remaining.
If it’s too short the string might slip off, but you don’t want it too high either. When in doubt, start with a small amount of nails hammered in because you can always hammer them in more if you need to.


Step 4: String up your DIY loom
Grab your string – I just used a simple white string that I found – and create a knot around one of the end nails on one side, so it’s secure. You’re going to then bring the string taught down to the corresponding nail on the bottom of the loom, loop it around, and then go back up to the second nail at the top, back to the second on the bottom … and so on until you get to the end, where you can tie it off.
Make sure it’s a good tension as you go.


Step 5: Start your weave
Grab your wool and start to weave! I had some spare wool from various projects, so I actually made a cardboard threader – about 10cm long and an inch or so wide – and wrapped wool around that so I could more easily weave over and under, over and under, across the DIY loom. When you get to the end, turn it out, and go back the other way, making sure you do the opposite pattern, so it stays together.
Step 6: Take it off the loom
When you’ve finished, your weaving will be all snug together. You need to then detach the weaving from the loom; the string comes with you. 😉
Use a dowel or bamboo or simple to thread through the top string loops of your weaving, and hang on the wall!

And that’s it! Super easy, very simple. You may find it takes a bit of practice, but this is a great craft if you want to do some weaving at home, or you want to do something with the kids, too.
This was my first weaving, so a bit more practice is definitely needed, but it’s an easy home project to do if you’re looking to get started with weaving.
Have you ever made a DIY loom? Will you give this a go? Let me know!
Originally written in November 2014. Updated in December 2024. ‘From L&P to English Tea’ was what the blog used to be called. 😉

Anjali Kay
Anjali Kay is an Aotearoa New Zealand-based blogger and book lover sharing travel inspiration, bookish posts, the occasional creative project, and a lot of practical blogging tips here at This Splendid Shambles. Based in Auckland, she's been writing book reviews and travel posts, sharing creative projects and blogging tips since she started her first blog in 2009. When she's not working on her own blog, Anjali also offers blog coaching and support for bloggers who want real guidance from someone who's actually done the work, and is a few chapters ahead of them.


Having fun? Check out these posts!

DIY Super Easy Original Phone Case

Christmas | 9 Alternative Christmas Trees
