

Halloween :: DIY Spooky Jars…
Last updated on 20 October 2021
This post may contain affiliate links. If you make a purchase with one of these links, I recieve a small commission at no additional cost to you. Read the full Affiliate Policy.

These Halloween Jars so super easy to make!
With Halloween just around the corner, I feel like it’s time to share some craft ideas, tutorials and general Halloween-madness. I was rummaging around the garage the other day and found a whole bunch of jars just sitting in a cupboard. I had seen a few different jar-Halloween-monsters around the internet but thought I’d have a go at making some myself.
I made 4 different Halloween-inspired jars, and I’m rather pleased with how they turned out. Today I’m just sharing 3 of those, but you can check out the poison jar here. To make these yourself, you’ll need a variety of things, but materials that differ slightly depending on which ones you go for.
Mummy Jar
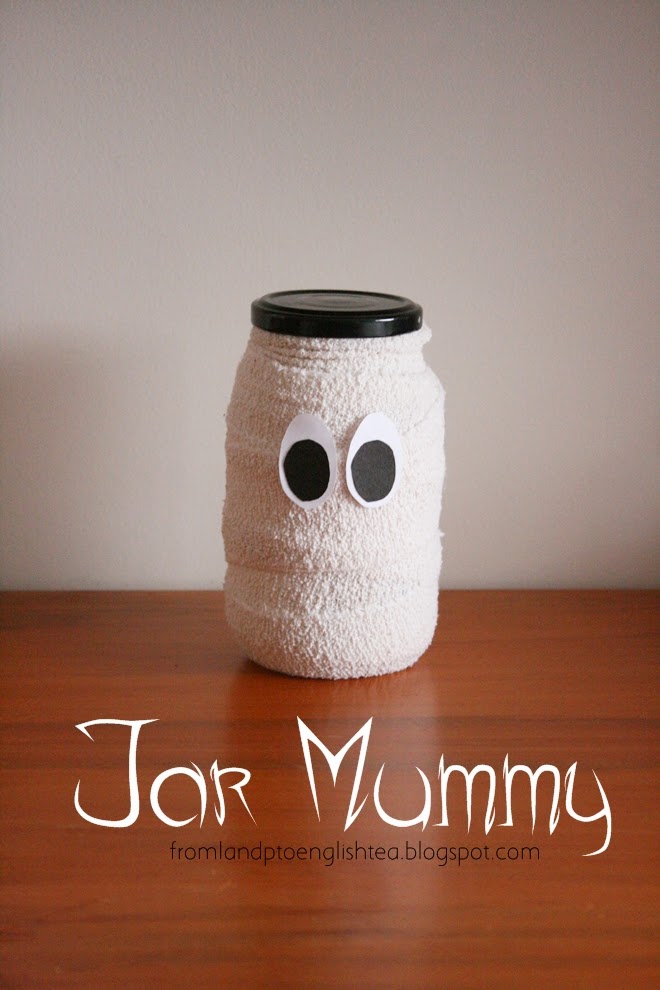
You need:
- A jar
- Bandage/s
- Some sort of adhesive (PVA, Mod Podge, hot glue etc}
- Black and white paper/card
- Scissors
To make this mummy, simply wrap the bandage around the jar with a bit of glue in points to hold it together, then cut out some eyes and stick them on. If you want to actually use your bandage for injuries after Halloween, put the end of the bandage inside the jar, wrap down the jar, and back up again, and put the end of the bandage into the jar also. Then just pop the lid on, and either double-sided tape the eyes on (it should easily come off) or insert them in such a way that the bandage holds them in place, by overlapping a little.
Pumpkin Jar
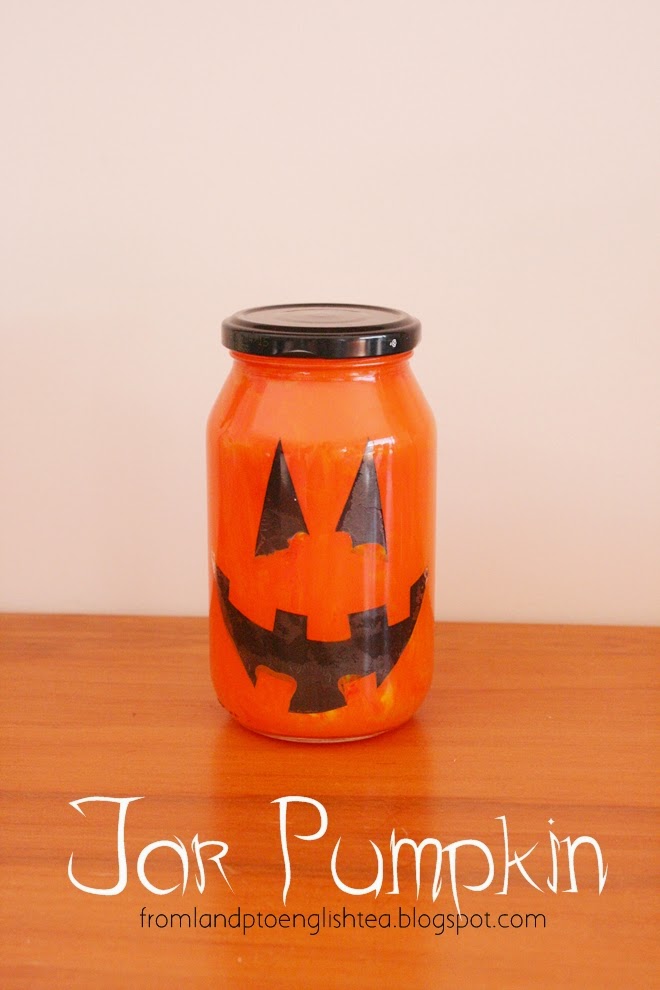
You need:
- A jar
- Orange paint
- Paintbrush
- Black card
- Scissors
- PVA glue or Mod Podge (or something similar that dries clear)
Cut out a carved pumpkin face from the black card, put glue all over the shapes, and (carefully!) put inside the jar, sticking the face to the inside of the glass. When’s it’s fully dried, paint the inside of the jar orange. You may find you need two coats, or make the first one quite thick. As you can see, I left the lid as it is, as it was black and I thought it went well with the face, but you can always cut out some paper or felt or material (either in orange to match, or green, as a pumpkin stem/thing) and glue or wrap it around the lid.
Frankenstein’s Monster Jar
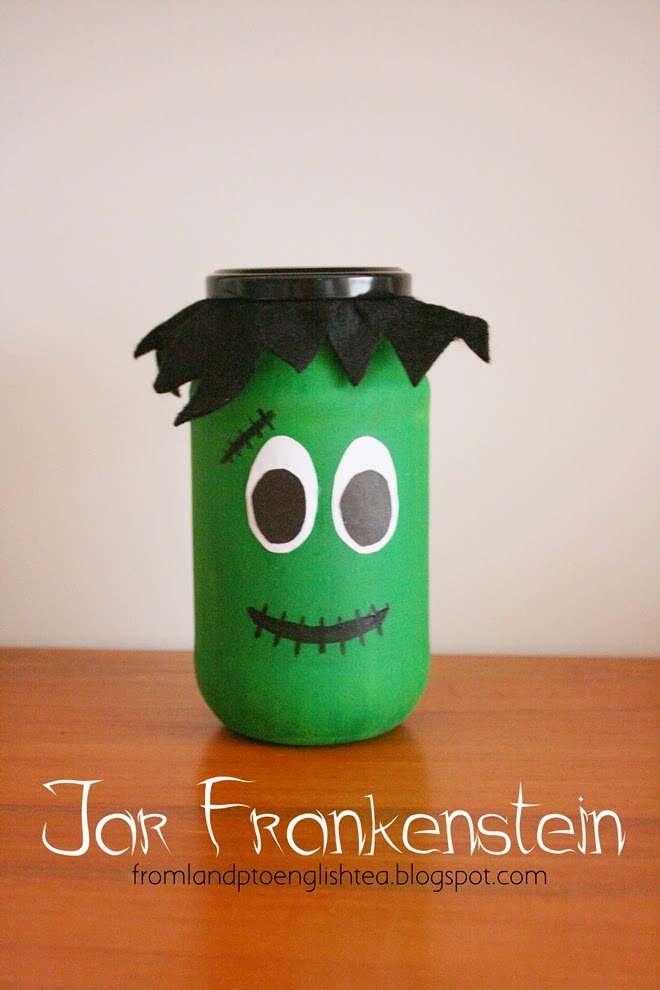
You need:
- A jar
- Green paint
- Paintbrush
- Black and white paper/card
- Scissors
- PVA glue or Mod Podge (or something similar that dries clear)
- Black felt
Start by painting the outside of the jar green. As it’s drying, cut out pieces of white and black paper/card for the eyes, and also a piece of felt for his hair. I had a square of felt, and then I just cut the edges into zigzags.
If you have a black jar lid, it can just be put on over the hair, which secures it. If you don’t have a black lid, simply glue the felt hair to the lid. When the paint is dry, stick on your eyes. Use a small paintbrush to paint on the mouth and any extras, like a scar. You could also add bolts coming from his head if you wanted. Try using the silver card, or hot glueing actual bolts or screws to the side. I know that Frankenstein is actually the Doctor, not the monster…but the world doesn’t really recognise that…so just go with it.
And there we have it! Three different ways to make Halloween jars. As you can see, for the pumpkin I painted on the inside of the jar, but for the Frankenstein, I painted on the outside. This was mainly to see what both ways looked like. The pumpkin was shiny because of the glass, while the Frankenstein was matte. It just depends on what look you’re after.
Have you ever made Halloween jars?


Anjali Kay
Anjali Kay is an Aotearoa New Zealand-based blogger and book lover sharing travel inspiration, bookish posts, the occasional creative project, and a lot of practical blogging tips here at This Splendid Shambles. Based in Auckland, she's been writing book reviews and travel posts, sharing creative projects and blogging tips since she started her first blog in 2009. When she's not working on her own blog, Anjali also offers blog coaching and support for bloggers who want real guidance from someone who's actually done the work, and is a few chapters ahead of them.


Having fun? Check out these posts!

Guest Post | Lauren Shares Her DIY Home

DIY Fireplace Bookshelf
